Saturday, November 29, 2014

Horse Juggling

Here's a fun fact about Desi that I don't think I've mentioned yet - he doesn't load. Its a really serious problem that even professional trainers have been unable to remedy. I had a trainer who specialized in trailer loading problems work with him for a month unsuccessfully and tell me that Desi is the worst case he's seen in 40 years. He was loading fine last spring and then one day he just stopped. And has pretty much refused to get in the trailer again. Long story short, I've started leasing a second horse because I can't say goodbye to Desi but I still want to show. My new lease is a paint gelding that lives at a different barn.

Well, here's where this post title comes into play. I now have to juggle the needs and schedules of two horses that live thirty minutes apart. My trainer (the paint's owner) wants me to work with him 2-3 days per week. Desi needs to be ridden 4-5 days per week with his Saddlebred energy level. So in my new balancing act, I've already discovered a few bits of advice that may prove to be very helpful for those of you considering taking on more than one horse.

  • MAKE A SCHEDULE!! And stick to it! It is possible to accomplish everything in a week if you plan it out beforehand. But nothing will make your life more crazy than diverting from your carefully planned schedule. For example, I ride Desi on Sundays, Tuesdays, Thursdays, and Fridays. The paint gets worked with on Mondays and Wednesdays with the occasional Saturday. I give myself Saturdays off most weeks because I'm only human. My body needs a rest and I have other things that need to get accomplished. 
  • Have a separate tack collection and grooming kit for each horse. Not only will this reduce the risk of transferring "gunk" (bacteria, illness, fungus, etc.) between the ponies, but switching between bits on your only bridle every day is not only annoying, but a waste of your time. You can get a cheap schooling bridle at a tack sale or eBay and make your daily life easier.
  • Remember that every horse is different. They will have different "feels" to them and will respond differently to training methods. Be prepared to be patient and flexible.
That's it for now. There's probably a lot more but I don't want to write a book about it :) Hope you guys have a great holiday season and get plenty of time with your furry ponies!

Friday, November 28, 2014

Quick Tip #5

Do you braid your horse's mane or tail in the winter to keep it protected and clean? If so, you probably use braiding bands to secure it. The ends of the hair are the most fragile and tight bands can easily break off them off. Instead, braid in a 1' section of soft ribbon and use this to secure the ends. It will be much better for the hair. You might even notice that your manes/tails seem to grow faster now that the fragile ends are better protected against breakage!

Wednesday, November 26, 2014

Delays.

I was planning to clip Desi today but my new clipper blades are late. Tomorrow is thanksgiving and after that, I'll be gone all weekend. So maybe I can do it next Tuesday. Maybe. I'm thinking that I'll start with a bib clip, see how that goes, then do the trace clip if he's handling everything well. Not much else to say, Thanksgiving isn't much of a horsey holiday.

Saturday, November 22, 2014

Furry Beasts!

My horse looks like a Sasquatch. And let me tell you, a fine boned Saddlebred  with, um, interesting conformation does NOT look good with this much hair. Plus with his work level, he's getting really sweaty during our rides and he takes forever to cool out and dry. His hair also gets wavy when it is getting wet and drying that way, and I selfishly think it looks really silly. So I've decided to alleviate some of this problem by doing a partial body clip. A rational person would hire someone to clip their horse if they've never done it before. Not me. I can't justify spending that money (which in my area is over $100) to have someone else do it. Theoretically my clippers, Wahl Arco Se's, are strong enough to do a trace clip. Well, either way I'm going to try - probably next Tuesday or Wednesday. I'll let you know how it goes, if small clippers and my limited experience with clipping produce an acceptable result... Or more likely curly hair will be nothing compared to the "masterpiece" I produce. I guess we'll just have to wait and see.

Thursday, November 20, 2014

DIY Rope Halters??

So I've been toying around with the idea of making a rope halter for awhile now. My only concern is that I don't really know where to buy the rope. Yes, you can get rope anywhere, but if I'm going to take the time and money to make one, I want to use the high quality yachting rope that all the clinicians seem to love. I've borrowed a Clinton Anderson halter from a friend before, and I do agree that they have a lovely "feel" for ground work, especially when paired with the yachting rope lead.


I did find the type of rope that I'm looking for at a marine supply store near my house, but it was twice the price of online retailers. I was just going to buy it online (for a great price I might add) until I went to check out and found that shipping was almost three times the price of my rope. :( At the price of buying it at a marine store, it's almost more economical just to buy a pre-made one off the internet, but that takes all the fun out of it.
Search "yacht rope halter" on the internet and you'll find tons of places that make them by hand for $15-20. But I'm the type of person who would rather make them then buy them, even if the price is a little better.

I just need to find a reasonably priced way to buy 22' of 1/4" yachting rope and 14' of the 3/4" (or 1/2") rope (for the lead) that won't cost an arm and a leg for shipping.

If I get bored in the future I may just suck it up and go get enough for the lead rope to start out with. Desi's current lead is in pretty sorry shape anyways.

I'd also love to make a pair of western reins with the same type of rope. I think the weight and "feel" of the quality rope would be great when used as reins too. Hmmmm. This may have to go on my project list, but I don't ride western much right now so it's a little hard to justify. Lol maybe I could do a "dressage style" rope rein like these. Yes, I know its not even remotely proper for dressage but I'm pretty sure I've looked weirder when I'm too lazy to take the bit off of Desi's western bridle, use his dressage saddle, and ride with an all purpose pad. I don't think weird reins would surprise anybody, plus I like the feel of the rope reins better that the lightweight leather reins.

A similar pair to these was available on eBay for $25

It's funny how blogging about all these great ideas is making my bank account hurt already.

Gearing up for the crazy season... erhm, I mean the holidays!

I'm a crazy nut-job when it comes to the holiday season. I decorate EVERYTHING and my horse has no choice but to participate in my day-after-thanksgiving decoration frenzy. Last year I posted a photo of a saddle pad that I had trimmed with white fur. Well, to inspire some new creativity this year I thought I'd post the final product :)
Unfortunately, I hadn't added the trim to the pad yet so it's not the complete ensemble...
Note the glittery silver star on his butt, it's hard to see in the picture but it's there.


Poor Desi had to wear this getup every ride through the whole month of December. At least he became thoroughly de-spooked to wearing all kinds of hats and fluff.

To complete the look, I wore a red coat, glued a Santa hat to my spare helmet, and played Christmas music during every ride!

Believe I'm crazy yet? Just you wait and see what lovely "decorations" I have in store for this year (Insert evil laugh here).

Wednesday, November 19, 2014

DIY Beaded Browband


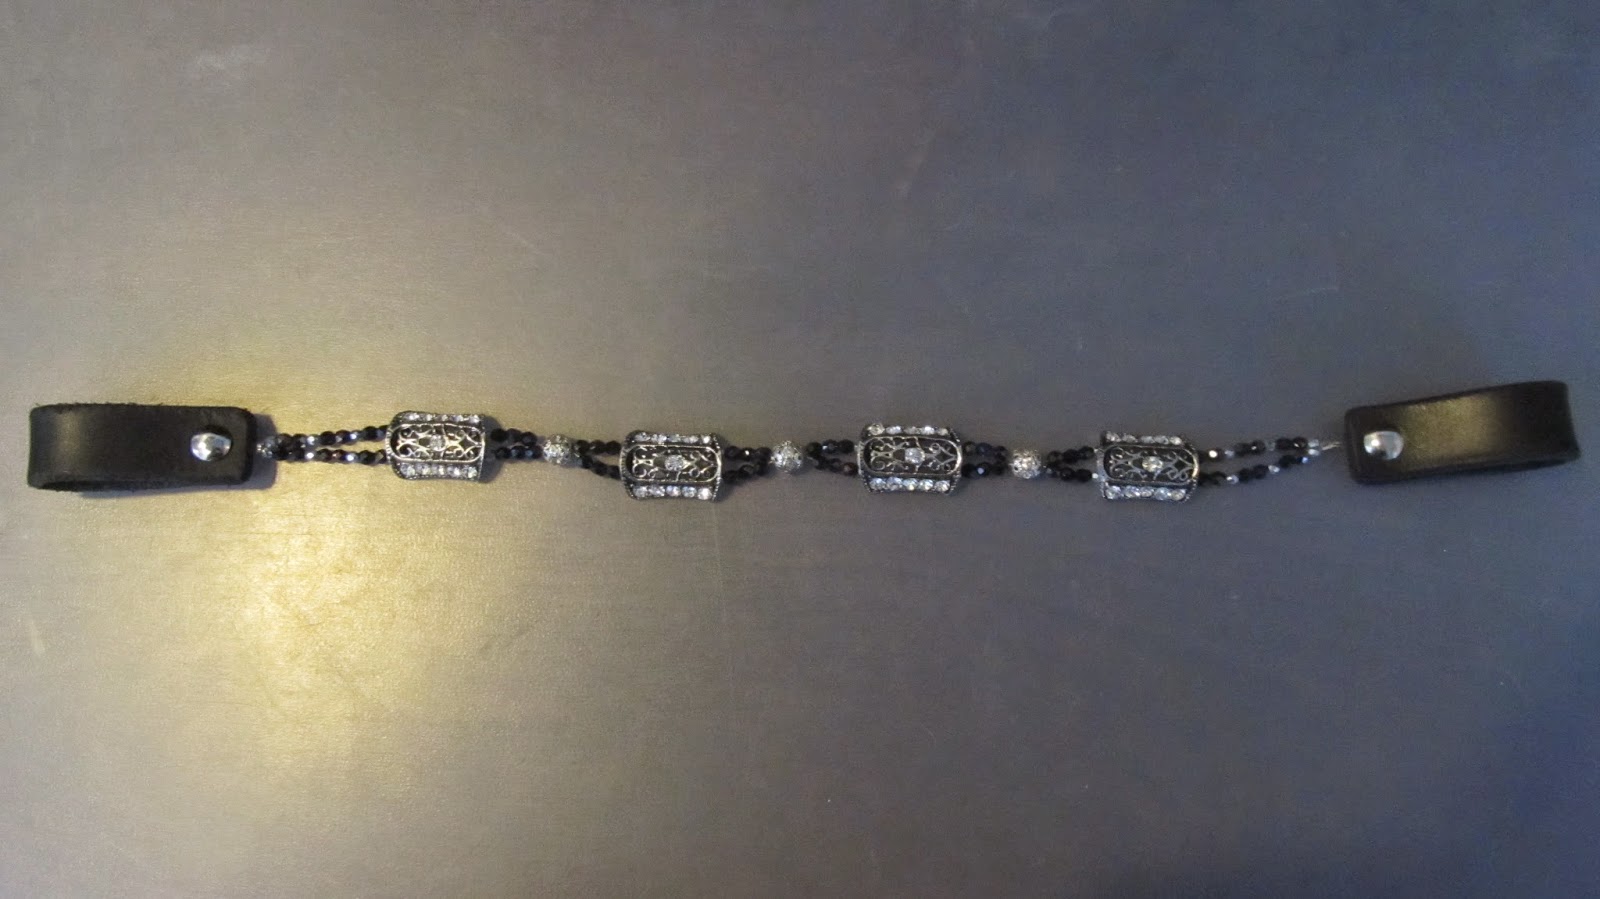
Yes! I know what you're thinking - less talking, more DIY!! So here's another project I made a few months ago. I think it turned out pretty well if I do say so myself...

And yes, this is the first published photo of the illustrious Desi...

The actual beading was itself pretty simple, I just strung my beads and crimped the strand with a tiny loop on each end. For my cob sized saddlebred, a 14" browband (Including the leather ends) was the perfect size. For a bigger horse, you will achieve the best results by measuring a browband that fits and making your beaded one to the same specifications.

The end pieces were made by buying 3/4" leather strips off the internet. These came with unfinished edges so I ended up buying Fiebing's Leather Dye in black and dying the edges with a q-tip. I drilled a hole in the ends using an electric screwdriver with small drill bit but a leather punch would have probably been easier...

I popped in a couple chicago screws that I had laying around and sandwiched the bead loops between the leather and put the screws through the middle.
Voila!

I also discovered that not every idea makes a great browband... Check out this fail
I bought some more accent beads at Michaels on sale last month so I'm looking forward to making some new browbands over the holidays!
Hope you are inspired! I've seen similar ideas done for one ear western headstalls too if you feel adventurous...